nvim migration
30 Jan 2025
I avoided Neovim for a long time because of backwards compatibility fear, even from Vim 7x to 8x compatibility is an issue, however this was unfunded, NeoVim could be more compatible with Vim than Vim itself, no need to learn Lua (at the beginning), took a day (a long one) to convert my 10 years old vim configuration to an almost identical setup in NeoVim with increased performance and better functionality.
Pros
- Fully compatible with Vimscripting, 90% vim plugins just works
- Faster than Vim and much faster than Studio Code, or any other graphical editor
- Integrated with latest plugin developments, eg: Github Copilot / Github Copilot Chat, matched only by Visual Studio Code and Jetbrains IDEs
- Thriving community, advanced users / developers, chance to choose from several implementations, all equality good and feature complete: eg, as for plugin manager: lazy.nvim, vim-plug, rocks.vim, etc.
- Multi OS support, a single configuration file can be used in Windows / OSX / Linux
Cons
- Medium / Hard to setup in comparition with vim which is available in most Unix systems by default
- Medium / Hard to master if you’re not used to vim
- Step curve if you’re only used to vimscripting and want to extend functionality
Windows 10/11
Neovim on Windows doesn’t require WSL, it works great if the proper environment is set, a good terminal emulator, fonts, and a gcc compiler to run the heavier plugins at the speed of though.
Dependencies
Chocolatey, a package manager that allows to install the other dependencies in a single command line, from an Admistrator PowerShell prompt:
Set-ExecutionPolicy Bypass -Scope Process -Force; [System.Net.ServicePointManager]::SecurityProtocol = [System.Net.ServicePointManager]::SecurityProtocol -bor 3072; iex ((New-Object System.Net.WebClient).DownloadString('https://community.chocolatey.org/install.ps1'))
Latest version of Powershell to have a better experience within the CLI in general:
choco install -y powershell-core
A better Terminal emulator:
choco install -y microsoft-windows-terminal
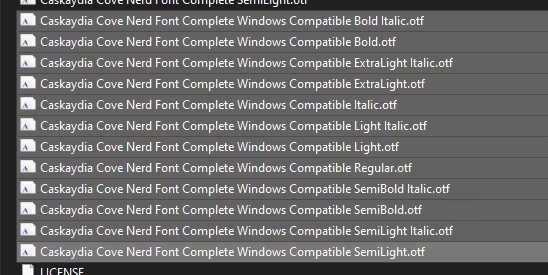
Fonts, go to Nerd Fonts and download your favorite, Caskaydia Cove is a good one, this would allow to have emojics in the terminal, once downloaded the archive unzip it and install the OTF files to “all users”
Install gcc , git and make to compile plugins and supercharge Nvim (optional):
choco install -y make
choco install -y mingw
choco install -y git
Install nvm and nodejs to setup Github Copilot integration (optional):
- Download and run https://github.com/coreybutler/nvm-windows/releases/download/1.2.2/nvm-setup.exe
- Install latest
nodejsfrom an Administration powershell prompt:nvm install latest - Configure latest version to provide nodejs:
nvm use 23.6.1
Dependencies configuration
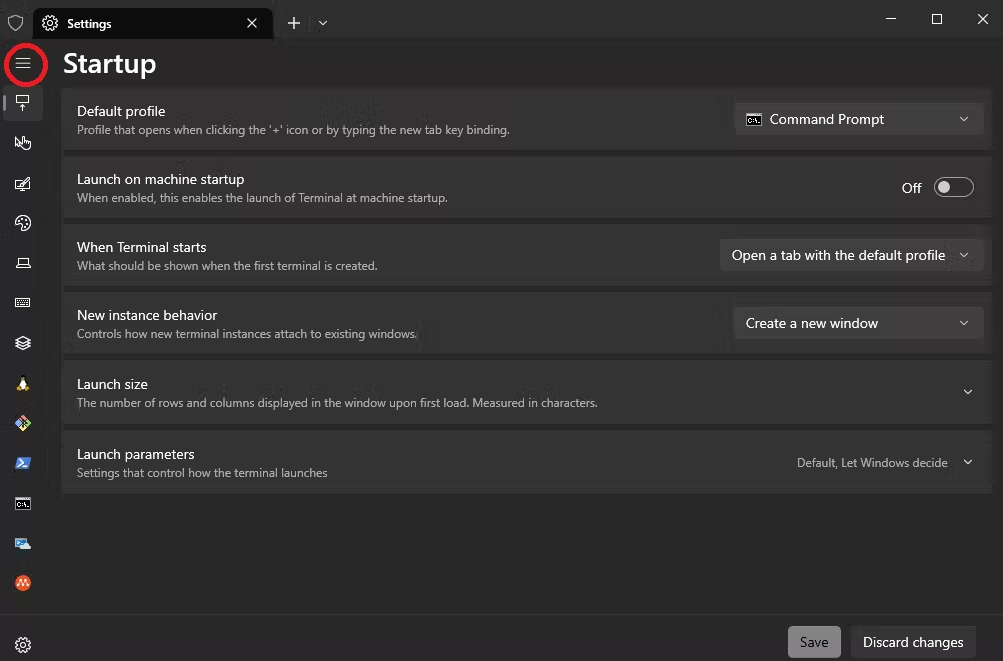
Configure the new Terminal to use the latest Powershell and the downloaded fonts:


Installation
Go to neovim/neovim and install the latest version for windows: nvim-win64.msi
NeoVim configuration
Due to Lua support Neovim init.lua configuration is cross platform compatible, you can set / unset preference based on the environment, it can also read vanilla vimscript therefore you could use your same vimrc settings, however unless you’re in a hurry, it’s recommended to migrate to lua at the earneast opportunity.
$ nvim .\AppData\Local\nvim\init.lua
Nvim and Vim support distributions, bundles that provide an advanced and uniformed experience, in terms of programming languages it would be comparable to Ruby on Rails, Django, CakePhp, etc, these distributions are ok if you’re looking for a battery included experience or if you’ve previous experience with Nvim, however as a learning exercise it’s a better to use a minimalist approach and enable only the interested features, this also allows you to customize your usage cases. Some good distribution examples are: lazyvim, nvchad, astronvim.
On this article, the focus would be in starting from a minimalist, single page,
documentated approach. Good configurations are personal, built over time with a
lot of polish. Get the content of kickstart.nvim/init.lua to .\AppData\Local\nvim\init.lua
Boostrapping
The 1st step is to create a mechanism to download a Nvim plugin manager in case none is locally installed and retrieve the configured plugins with their dependencies, NOTE: This code is already included in the kickstart.nvim file referenced above, it’s shown here only for analysis / understanding. There are several plugins manager but on this article we would refer to lazy.nvim
local lazypath = vim.fn.stdpath 'data' .. '/lazy/lazy.nvim'
if not (vim.uv or vim.loop).fs_stat(lazypath) then
    local lazyrepo = 'https://github.com/folke/lazy.nvim.git'
    local out = vim.fn.system { 'git', 'clone', '--filter=blob:none', '--branch=stable', lazyrepo, lazypath }
    if vim.v.shell_error ~= 0 then
        error('Error cloning lazy.nvim:\n' .. out)
    end
end
Vim traditional configuration
Vim settings are available via lua:
vim.g.mapleader = ","
vim.g.maplocalleader = ","
Or they can be read as vimscripting files:
vim.cmd('source my_vim_script.vim')
Plugin installation
Lazy.nvim support from simple to quite complex escenarios, eg:
require("lazy").setup({
    "javier-lopez/my-autoloads.vim", -- the most simple case, plugins hosted in https://github.com/javier-lopez/my-autoloads.vim
    "javier-lopez/my-mappings.vim",
    { "javier-lopez/my-sensible.vim", -- plugins with dependencies
        dependencies = {
            "javier-lopez/cutils.vim",
        },
    },
    { "javier-lopez/colors.vim", -- plugins with priorization + initial customization
        priority = 1000, -- Make sure to load this before all the other start plugins.
        init = function()
            vim.cmd.colorscheme("hemisu")
        end,
    },
    -- Highlight todo, notes, etc in comments
    { "folke/todo-comments.nvim", -- plugins with lazy loading, plugin would wait until UI is drawn to load
        event = "VimEnter",
        dependencies = { "nvim-lua/plenary.nvim" },
        opts = { signs = false },
    },
)}
Github Copilot integration
Within the hrsh7th/nvim-cmp depency section add zbirenbaum/copilot-cmp and zbirenbaum/copilot.lua:
- nvim-cmp is an auto completion framework for nvim, sources are programmable, on this case we’re adding copilot-cmp to have Copilot suggestions as part of our editing experience, other cmp plugins are:
- hrsh7th/cmp-path #autocompletes file / directory paths
- hrsh7th/cmp-buffer #autocompletes buffer words
- hrsh7th/cmp-calc #complete math operations
- hrsh7th/vim-vsnip #autocompletes snippets
- zbirenbaum/copilot.lua is a pure Lua implementation of the official github/copilot.vim
Once installed run :Copilot auth:
{ "hrsh7th/nvim-cmp", -- Autocompletion plugin
    event = "InsertEnter", -- Lazy load until user enters Insert mode
    dependencies = {
        { "zbirenbaum/copilot-cmp",
            event = "InsertEnter",
            config = function () require("copilot_cmp").setup() end,
            dependencies = { "zbirenbaum/copilot.lua", -- core package that interacts with gh copilot api
                cmd = "Copilot",
                config = function()
                require("copilot").setup({
                    -- It is recommended to disable copilot.lua's suggestion and panel modules, as they can interfere with completions properly appearing in copilot-cmp.
                    suggestion = { enabled = false },
                    panel = { enabled = false },
                    copilot_node_command = vim.fn.expand("$HOME") .. "/AppData/Local/nvm/v23.6.1/node.exe",
                })
                end,
            },
        },
    },
},
Within the nvim-cmp configuration set the <Enter> and <Tabs> keys as suggestion selectors and include the copilot source:
cmp.setup({
    mapping = cmp.mapping.preset.insert({
    --["<C-y>"] = cmp.mapping.confirm({ select = true }),
    ['<CR>'] = cmp.mapping.confirm { select = true }, -- <Enter> accepts the suggestion
    ['<Tab>'] = cmp.mapping.select_next_item(), -- Iterate over suggestions
    ['<S-Tab>'] = cmp.mapping.select_prev_item(), -- <Shift><Tab> Iterate backwards
    ...
    }),
    sources = {
        { name = "path" },
        { name = "calc" },
        { name = "copilot" },
    }
})
CopilotC-Nvim/CopilotChat.nvim integrates Copilot Chat:
{ "CopilotC-Nvim/CopilotChat.nvim",
    -- press <Ctrl-s> to apply instructions
    dependencies = {
        { "zbirenbaum/copilot.lua" },
        { "nvim-lua/plenary.nvim", branch = "master" }, -- for curl, log and async functions
    },
    -- build = "make tiktoken", -- Only on MacOS or Linux
    keys = {
        {
            "<leader>h",
            function()
                return require("CopilotChat").toggle()
            end,
            desc = "CopilotChat - Toggle Main Window",
            mode = { "n", "v" },
        },
        {
            "<leader>oo",
            function()
                return require("CopilotChat").toggle()
            end,
            desc = "CopilotChat - Toggle Main Window",
            mode = { "n", "v" },
        },
        {
            "<leader>ol",
            function()
                return require("CopilotChat").reset()
            end,
            desc = "CopilotChat - Clear Main Window",
            mode = { "n", "v" },
        },
        {
            "<leader>oa",
            function()
                local input = vim.fn.input("Action Over File: ")
                if input ~= "" then
                    require("CopilotChat").ask(input, { selection = require("CopilotChat.select").buffer })
                end
            end,
            desc = "CopilotChat - Action Over File",
        },
    },
},
Happy hacking!